聊聊Angular中NgTemplateOutlet指令的理解和用法
本篇文章带大家了解一下Angular中NgTemplateOutlet指令,介绍一下NgTemplateOutlet这个结构性指令的理解与应用,希望对大家有所帮助!

最近在看一个培训项目的时候有看到这个NgTemplateOutlet这个结构性指令,但是我之前没接触过,不知道这东西是怎么用的,然后,我去官网上去搜了一下这个api(官网链接点这里)。
但是它的这个api说明我看不懂,不知道这个什么所谓的上下文对象是啥,也不知道这个let变量又是啥。然后经过我一整天的翻文档,记笔记,终于搞明白了这是什么东西了,没有搞明白的小伙伴可以参考一下我的上一篇文章:【Angular学习】关于模板输入变量(let-变量)的理解
这篇文章就只是说一下NgTemplateOutlet的用法和使用场景。【相关教程推荐:《angular教程》】
使用方法
这个api按照官网的说法是这样的:
根据一个提前备好的
TemplateRef插入一个内嵌视图。
我给它翻译一下:使NgTemplateOutlet的宿主元素变成一个内嵌视图——这个内嵌视图是根据一个提前定义好的templateRef模板引用生成的。而宿主元素无论是什么元素,都不会被渲染出来。
我们将官网的示例改一下(因为官网的人命我看不懂):
@Component({
selector: 'ng-template-outlet-example',
template: `
<ng-container *ngTemplateOutlet="one"></ng-container>
<hr>
<ng-container *ngTemplateOutlet="two; context: myContext"></ng-container>
<hr>
<ng-container *ngTemplateOutlet="three; context: myContext"></ng-container>
<hr>
<ng-template #one><span>Hello</span></ng-template>
<ng-template #two let-name><span>Hello {{name}}!</span></ng-template>
<ng-template #three let-person="lastName">My name is <span>LeBron {{person}}!</span></ng-template>
`
})
export class NgTemplateOutletExample {
myContext = {$implicit: 'World', lastName: 'James'};
}一个宿主元素可以使用ngTemplateOutlet这个结构性指令,使自己变成任意的一个let-变量这个模板输入变量来获取上下文对象中的值,这个模板更具灵活性。
应用场景
类似于ng-zorro这个框架的分页组件Pagination(官网链接)。如果我们对默认上一页和下一页的样式或者结构不满意,想要自己调整的话,我们可以提供一个输入属性(@Input定义的属性),来接收一个模板,并且为其提供所必须的属性或者方法。这样的话,我们就可以在不修改组件源码的情况下实现组件的复用。
Demo
我们先定义一个子组件HeroDisplayCard,角色的展示界面
@Component({
selector:'app-hero-display-card',
template:`
<h2 [style]="{textAlign:'center'}">角色列表</h2>
<ul class="hero-card-box">
<li class="hero-card-item" *ngFor="let h of heroesList">
<p [style]="{textAlign:'center'}">
角色id:{{h.id}}--
角色名字:{{h.name}}--
角色属性:{{h.features}}
</p>
</li>
</ul>
`,
styles:[
`.hero-card-box{
width: 600px;
margin: 10px auto;
}
.hero-card-item{
list-style: none;
}
`
]
})
export class HeroDisplayCard {
public heroesList = [
{id:'013',name:'钟离',features:'rock'},
{id:'061',name:'烟绯',features:'fire'},
{id:'022',name:'迪奥娜',features:'ice'},
{id:'004',name:'诺艾尔',features:'rock'},
]
}然后将这个组件引入一个父组件当中:
@Component({
  selector:'app-templateoutlet-app-demo',
  template:`
    <app-hero-display-card></app-hero-display-card>
  `
})
export class TemplateOutletAppDemoComponent {}
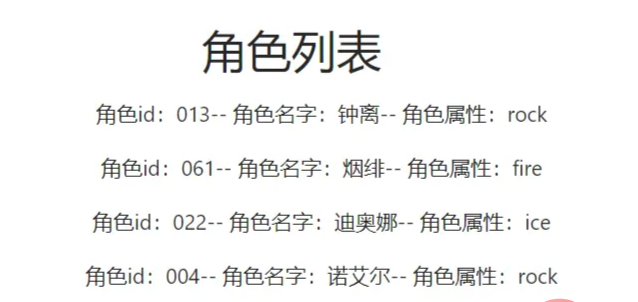
代码运行一下,效果如图:

我觉得这个li的样式实在是太丑了,而且顺序也不太对。我希望把角色属性调到角色名字之前。这样的话,如果只是单纯的通过输入属性来更改样式的话就会变得很麻烦,我们可能需要定义非常多的变量来供使用者选择,这样的话有点得不偿失。那么我们何不直接提供一个模板给使用者,我们只需要提供必要的数据就可以了。样式,排版这些自由交给使用者。
那么对于子组件HeroDisplayCard我们可以这么改:
@Component({
selector:'app-hero-display-card',
template:`
<h2 [style]="{textAlign:'center'}">角色列表</h2>
<ul class="hero-card-box">
<ng-container *ngFor="let h of heroesList">
<!-- 如果没有传入cardItemTemplate则显示默认 -->
<li class="hero-card-item" *ngIf="!cardItemTemplate">
<p [style]="{textAlign:'center'}">
角色id:{{h.id}}--
角色名字:{{h.name}}--
角色属性:{{h.features}}
</p>
</li>
<!-- 如果传入了自定义模板,则显示出来,鉴于angular的结构型指令不能在同一个宿主元素上的规定,于是这样写 -->
<ng-container *ngIf="cardItemTemplate">
<!-- 将自定义模板的上下文对象设置为h -->
<ng-container *ngTemplateOutlet="cardItemTemplate;context:h"></ng-container>
</ng-container>
</ng-container>
</ul>
`,
styles:[ //省略 ]
})
export class HeroDisplayCard {
@Input() cardItemTemplate:TemplateRef<any>;
public heroesList = [ // 省略]
}然后我们在父组件中将自定义的模板传入进去:
@Component({
  selector:'app-templateoutlet-app-demo',
  template:`
    <app-hero-display-card [cardItemTemplate]="myCardTemplate"></app-hero-display-card>
	<!-- 将模板引用变量myCardTemplate传入子组件 -->
    <ng-template #myCardTemplate let-id="id" let-name="name" let-features="features">
      <li class="hero-card-custom-item">
        <p>角色id:<span>{{id}}</span></p>
        <p>角色属性:<span>{{features}}</span></p>
        <p>角色名字:<span>{{name}}</span></p>
      </li>
    </ng-template>
  `,
  styles:[
    //在这里写自定义模板的样式
    `.hero-card-custom-item{
      width: 100%;
      height: 35px;
      border: 1px solid #999999;
      border-radius: 5px;
      display: flex;
      justify-content:space-around;
      align-items: center;
      margin: 10px 0;
    }
    .hero-card-custom-item p {
      width: 30%;
      margin: 0;
      font-size: 20px;
      color: #666666;
    }
    .hero-card-custom-item p span {
      color: red;
    }`
  ]
})
export class TemplateOutletAppDemoComponent {}
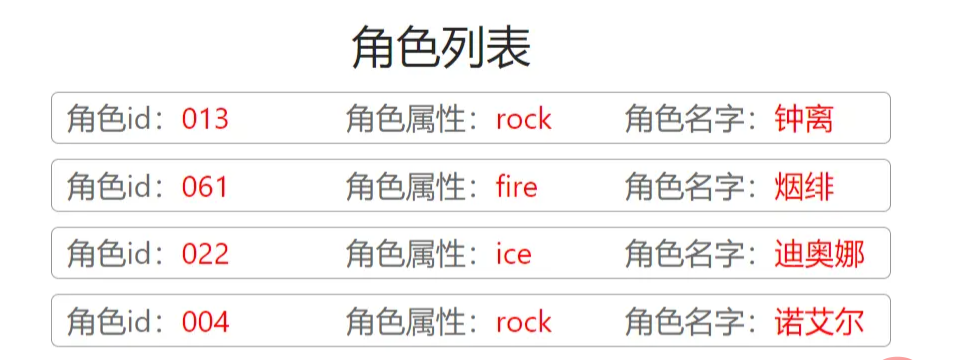
然后运行一下,效果如图(其实还是很丑):

总结
使用NgTemplateOutlet这个结构性指令可以增强我们子组件的封装程度,避免需要定义大量的输入属性,导致父组件的模板看起来臃肿不堪。
更多编程相关知识,请访问:编程入门!!
以上就是聊聊Angular中NgTemplateOutlet指令的理解和用法的详细内容,更多请关注https://www.sxiaw.com/其它相关文章!
