总结归纳window.history对象的应用
本篇文章给大家带来了关于javascript的相关知识,其中主要介绍了window.history对象的相关问题,History 对象包含用户(在浏览器窗口中)访问过的 URL,下面一起来看一下,希望对大家有帮助。

【相关推荐:javascript视频教程、web前端】
History 对象包含用户(在浏览器窗口中)访问过的 URL。
History 对象是 window 对象的一部分,可通过 window.history 属性对其进行访问。
注意: 没有应用于History对象的公开标准,不过所有浏览器都支持该对象。

描述:页面栈对象
说明:栈区特征为(后进先出),堆区特征为(先进先出)
内容:
- (1)window.history.back() 跳转到栈中的上一个页面
- (2)window.history.forward() 跳转到栈中的下一个页面
- (3)window.history.go(num) 跳转到栈中的指定页面
- (4)window.history.length 栈中页面的数量
注意:
- a.通过window.history对象中提供的方法进行的页面跳转并不会向栈中添加新的页面。
- 通过window.location.href或者通过a标签进行的跳转,则会向栈中添加新的页面。
- b.栈区特征(后进先出),不仅仅意味着后进来的内容先被移除栈,还意味着栈中的内容如果想要添加到指定位置,必须先将之前的内容退栈才行。

<h2>第一页</h2>
<button class="next">去到第二页</button>
<hr/>
<h3>window.history对象提供的方法</h3>
<button class="back">window.history.back()</button>
<button class="forward">window.history.forward()</button>
<button class="go">window.history.go(2)</button>
<button class="length">window.history.length</button>
<script>
var nextBut = document.querySelector('.next');
var backBut = document.querySelector('.back');
var forwardBut = document.querySelector('.forward');
var goBut = document.querySelector('.go');
var lengthBut = document.querySelector('.length');
nextBut.onclick = function() {
document.location.href = '11第2个页面.html';
}
backBut.onclick = function() {
window.history.back()
}
forwardBut.onclick = function() {
window.history.forward()
}
goBut.onclick = function() {
window.history.go(2)
}
lengthBut.onclick = function() {
console.log(window.history.length)
}
</script>
当单击“去到第二页”按钮时:
第二个页面:
<h2>第二个页面</h2>
<button class="next">去到第三页</button>
<hr/>
<h3>window.history对象提供的方法</h3>
<button class="back">window.history.back()</button>
<button class="forward">window.history.forward()</button>
<button class="go">window.history.go(2)</button>
<button class="length">window.history.length</button>
<script>
var nextBut = document.querySelector('.next');
var backBut = document.querySelector('.back');
var forwardBut = document.querySelector('.forward');
var goBut = document.querySelector('.go');
var lengthBut = document.querySelector('.length');
nextBut.onclick = function() {
document.location.href = '11第3个页面.html';
}
backBut.onclick = function() {
window.history.back()
}
forwardBut.onclick = function() {
window.history.forward()
}
goBut.onclick = function() {
window.history.go(2)
}
lengthBut.onclick = function() {
console.log(window.history.length)
}
</script>当单击”去到第三页“按钮时:

当然,底下的几个按钮都可以点击,感兴趣的自己动手试试,然后进行尝试!
第三个页面:
<h2>第三个页面</h2>
<button class="next">去到第四页</button>
<hr/>
<h3>window.history对象提供的方法</h3>
<button class="back">window.history.back()</button>
<button class="forward">window.history.forward()</button>
<button class="go">window.history.go(2)</button>
<button class="length">window.history.length</button>
<script>
var nextBut = document.querySelector('.next');
var backBut = document.querySelector('.back');
var forwardBut = document.querySelector('.forward');
var goBut = document.querySelector('.go');
var lengthBut = document.querySelector('.length');
nextBut.onclick = function() {
document.location.href = '11第4个页面.html';
}
backBut.onclick = function() {
window.history.back()
}
forwardBut.onclick = function() {
window.history.forward()
}
goBut.onclick = function() {
window.history.go(2)
}
lengthBut.onclick = function() {
console.log(window.history.length)
}
</script>效果图如下:当单击”去到第四页“按钮时:
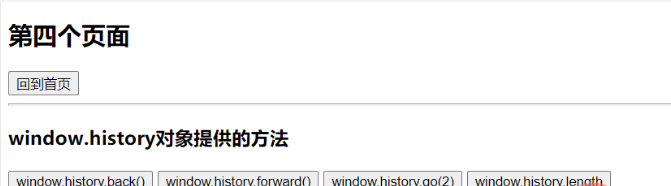
第四个页面:
<h2>第四个页面</h2>
<button class="next">回到首页</button>
<hr/>
<h3>window.history对象提供的方法</h3>
<button class="back">window.history.back()</button>
<button class="forward">window.history.forward()</button>
<button class="go">window.history.go(2)</button>
<button class="length">window.history.length</button>
<script>
var nextBut = document.querySelector('.next');
var backBut = document.querySelector('.back');
var forwardBut = document.querySelector('.forward');
var goBut = document.querySelector('.go');
var lengthBut = document.querySelector('.length');
nextBut.onclick = function() {
document.location.href = '11window.history对象.html';
}
backBut.onclick = function() {
window.history.back()
}
forwardBut.onclick = function() {
window.history.forward()
}
goBut.onclick = function() {
window.history.go(2)
}
lengthBut.onclick = function() {
console.log(window.history.length)
}
</script>效果图如下:当单击”回到首页“按钮时:

【相关推荐:javascript视频教程、web前端】
以上就是总结归纳window.history对象的应用的详细内容,更多请关注https://www.sxiaw.com/其它相关文章!