“saturate”,又get了新的CSS知识!
本篇文章给大家带来了关于CSS的相关知识,其中主要介绍了我因为好奇,get了一个新的CSS知识,什么东西让我好奇呢?感兴趣的朋友,下面一起来看一下吧,可能你也会很好奇,哈哈。
大家在查阅Element UI文档的时候,是否发现下面这个效果
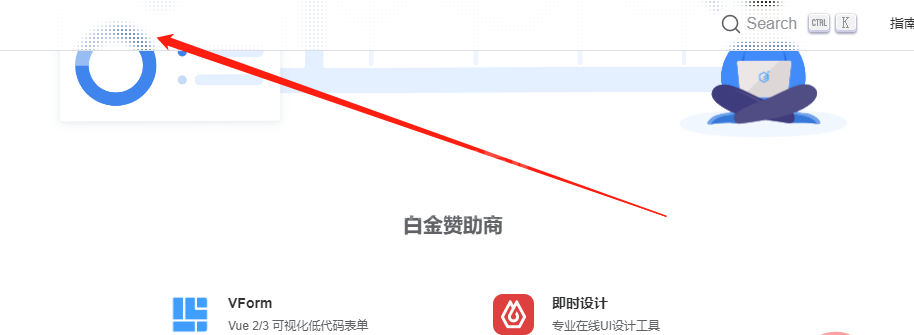
好家伙,这个效果该怎么实现呢?我的思路是设置背景图为白色和透明相间,这样底下的图片就能穿透部分上来,形成一个类似毛玻璃的效果。话不多说,咱们一起来写代码试试能否实现:
背景如何镂空
.header {
    position: fixed;
    top: 0;
    width: 100%;
    height: 400px;
    background-image: radial-gradient(transparent 50px, #fff 50px);
    background-size: 200px 200px;
    background-color: yellow;
}
这边使用的是径向渐变的方式,给背景设置一个中间透明,四周白色的背景,可能以上代码并不能很好体现这个背景如何生效的,我们来看看下面这个:
.header {
    position: fixed;
    top: 0;
    width: 100%;
    height: 400px;
    background-image: radial-gradient(transparent 50px, #fff 50px);
    background-size: 200px 200px;
    background-color: yellow;
+   background-repeat: no-repeat;
}
懂了吧?就是一个这种的小方块平铺形成的。假如我们的背景色不设置,那么这就是一个镂空的背景。
如何设置背景尺寸合适
我们可以看到我们的小圆孔是很均匀排列开的,假如我改一下背景的尺寸,效果如下:
.header {
    position: fixed;
    top: 0;
    width: 100%;
    height: 400px;
    background-image: radial-gradient(transparent 50px, #fff 50px);
    background-size: 120px 120px;
    background-color: yellow;
    /* background-repeat: no-repeat; */
}
可以看到,圆孔变得密集了,那么背景尺寸调到多少会变成完全透明呢?我口算了一下,应该是
50根号2,也就是大概71px。试试?
.header {
    position: fixed;
    top: 0;
    width: 100%;
    height: 400px;
    background-image: radial-gradient(transparent 50px, #fff 50px);
    background-size: 71px 71px;
    background-color: yellow;
    /* background-repeat: no-repeat; */
}
为了看的更加清楚,我们将原本的白色改成黑色,并且把
71px改成72px:
 出现黑色点点了!说明我算的不错,一点不差,我可真棒!ok,咱们继续探索
这个蒙板还不错
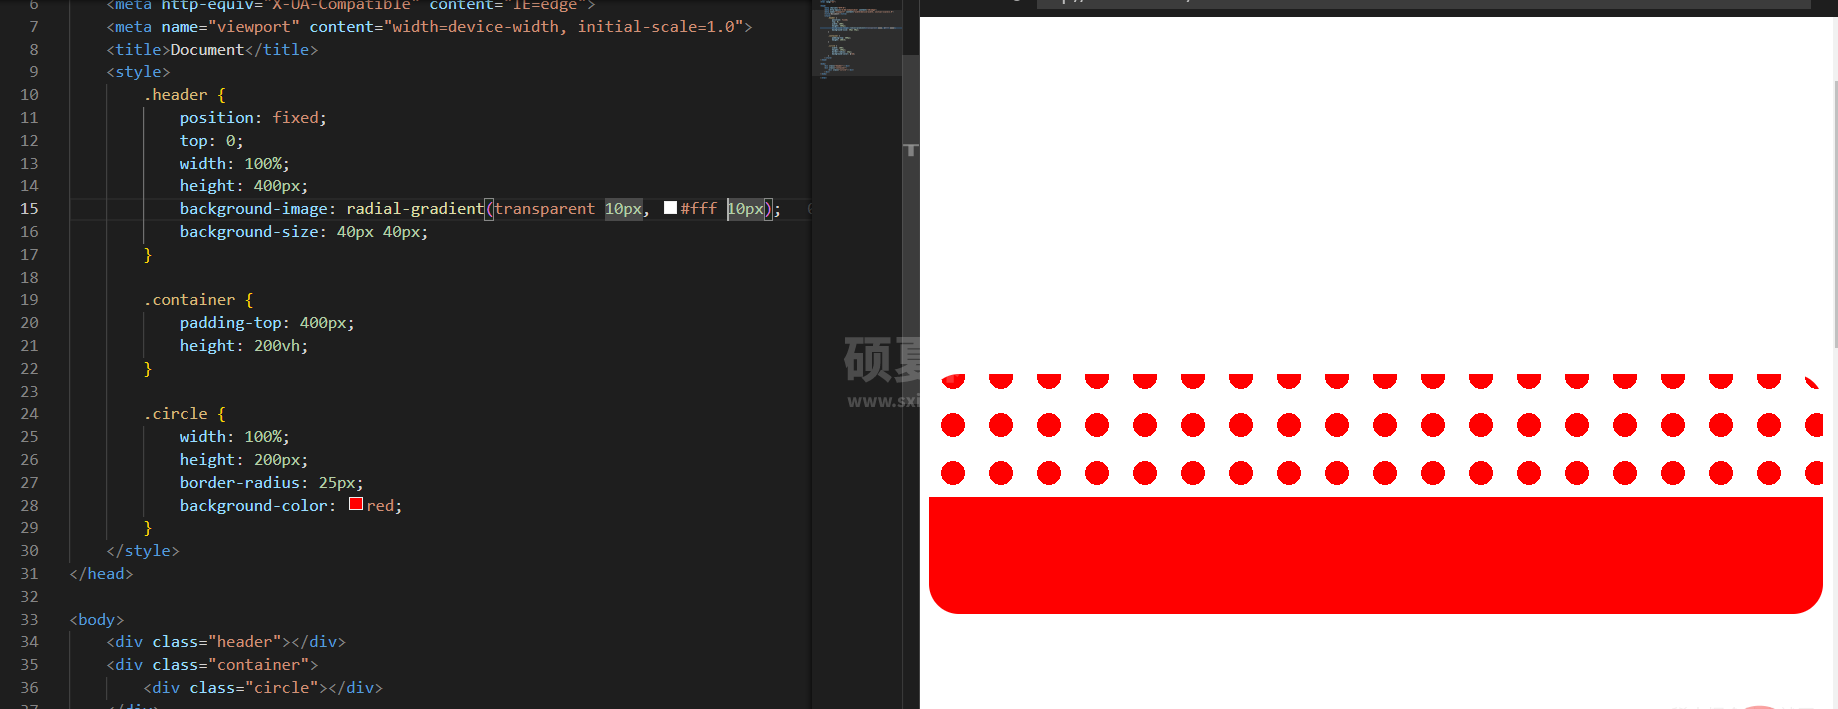
我们现在要对标Element 官网那样的效果,我做了下面的例子:
.header {
    position: fixed;
    top: 0;
    width: 100%;
    height: 400px;
    background-image: radial-gradient(transparent 10px, #fff 10px);
    background-size: 40px 40px;
}

.container {
    padding-top: 400px;
    height: 200vh;
}

.circle {
    width: 100%;
    height: 200px;
    border-radius: 25px;
    background-color: red;
}
修改下尺寸:
background-image: radial-gradient(transparent 1px, #fff 1px);
background-size: 4px 4px;
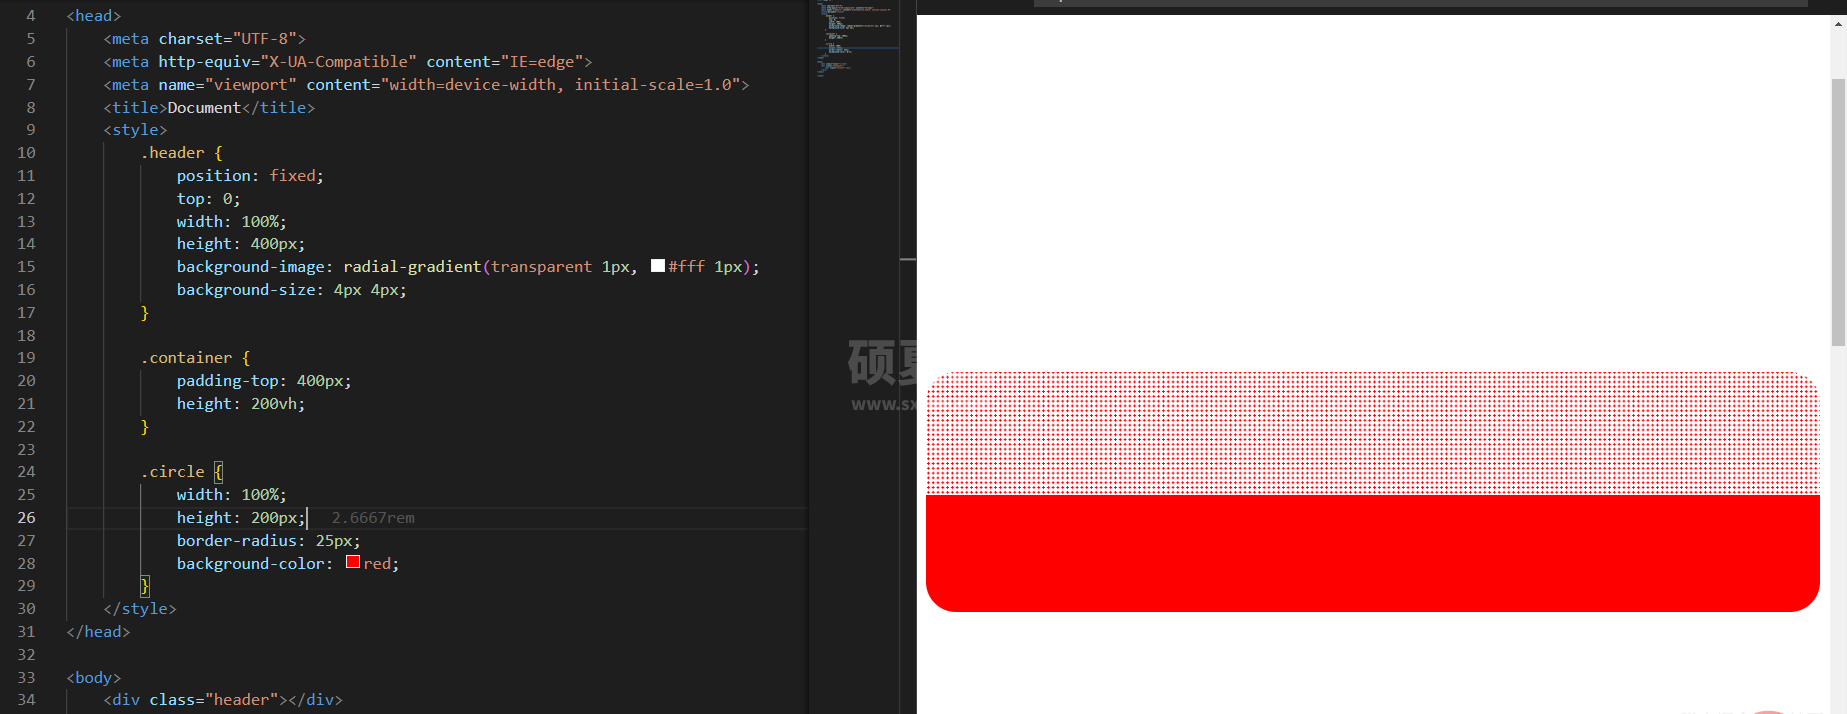 至此,这个效果就基本做好了,但是还是有差别,人家的有毛毛的效果,我的没有。不行,得学习下人家是怎么做的!
Element 是怎么做的
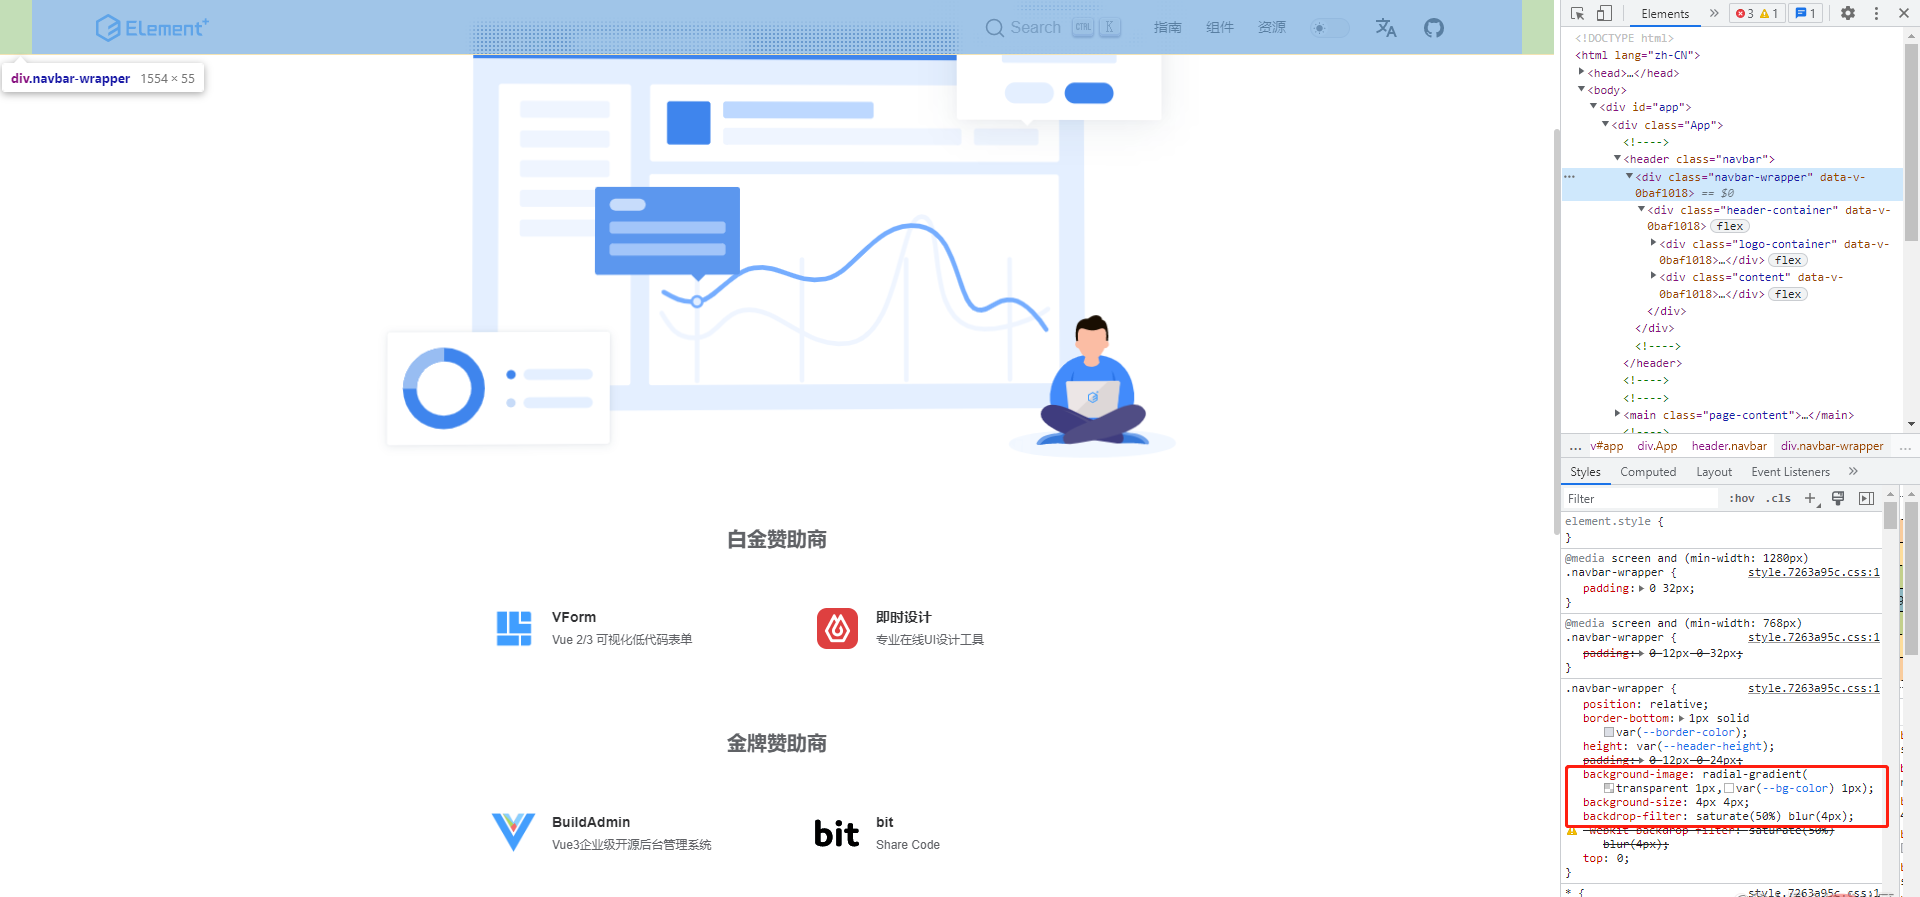 代码如下:
代码如下:
.navbar-wrapper {
  position: relative;
  border-bottom: 1px solid var(--border-color);
  height: var(--header-height);
  padding: 0 12px 0 24px;
  background-image: radial-gradient(transparent 1px,var(--bg-color) 1px);
  background-size: 4px 4px;
  backdrop-filter: saturate(50%) blur(4px);
  -webkit-backdrop-filter: saturate(50%) blur(4px);
  top: 0;
}欧?backdrop-filter这个是什么,以前没用过耶,尝试一下。这里有两个属性,第一个有点陌生,第二个应该是设置毛玻璃效果的虚化吧,先试咱们会的:
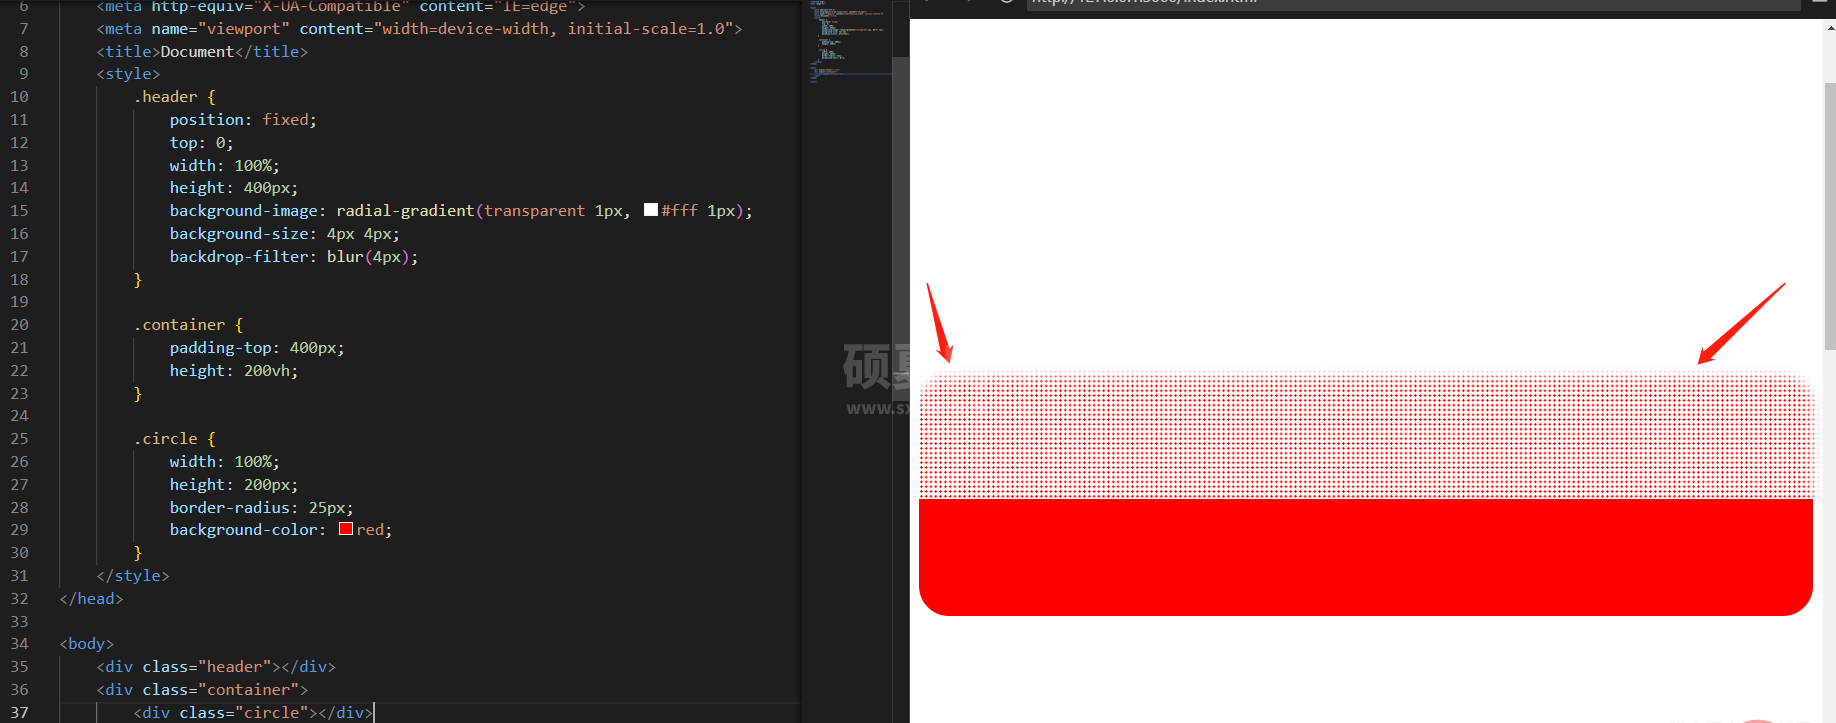
确实有虚化效果。那saturate又是干嘛的呢?试试就知道了:
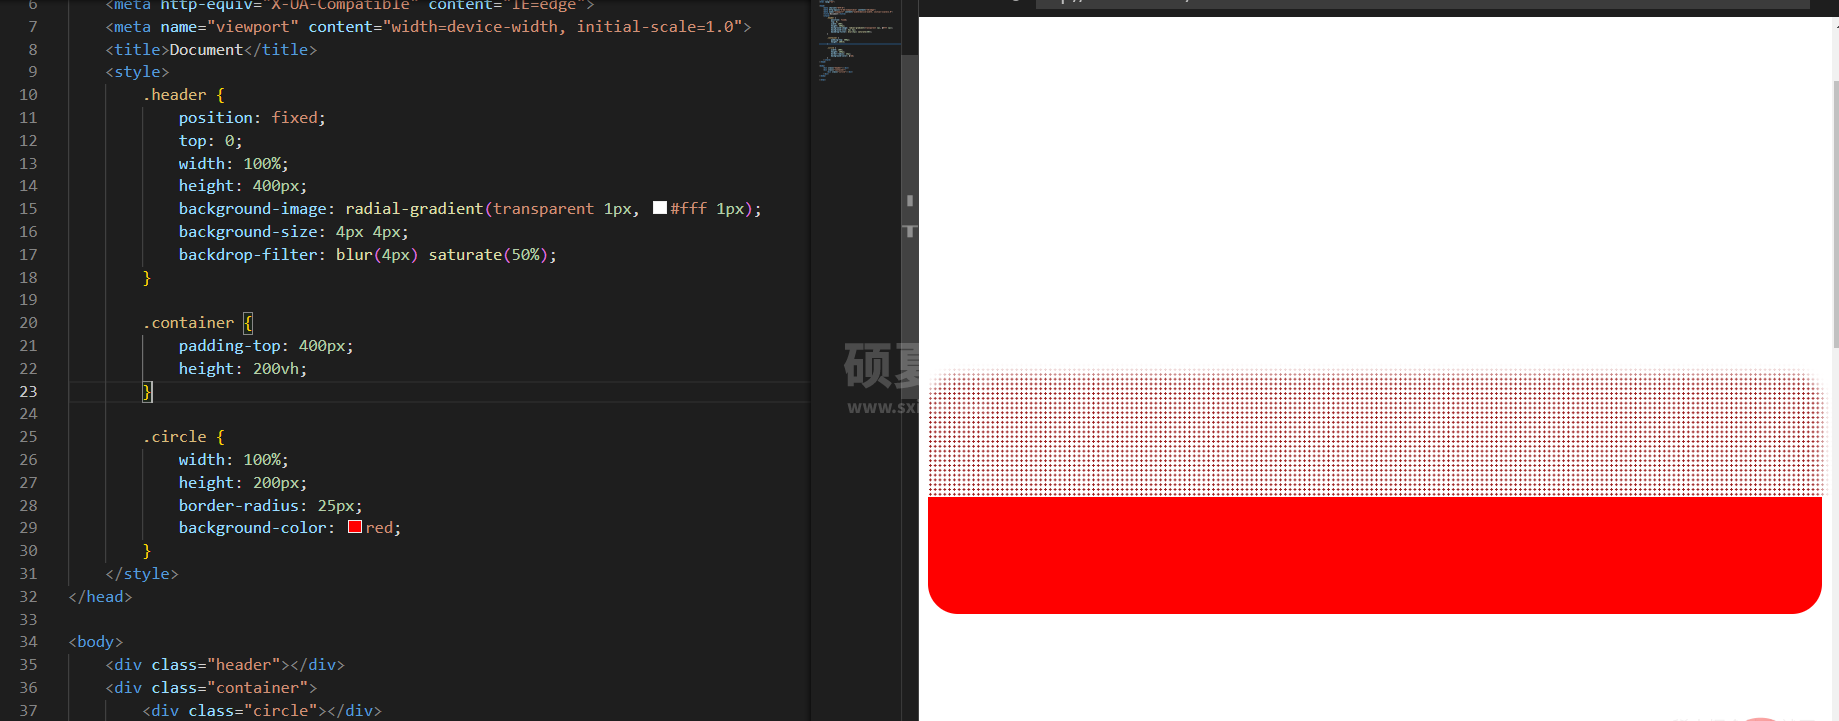
唔,变暗了呢
 查了下英文意思是使湿透的意思,emmmm,好像红色的衣服湿了确实就变成暗红了,有点意思。这边有个百分比的设置,尝试一下效果:
我们将百分比设置为10%:
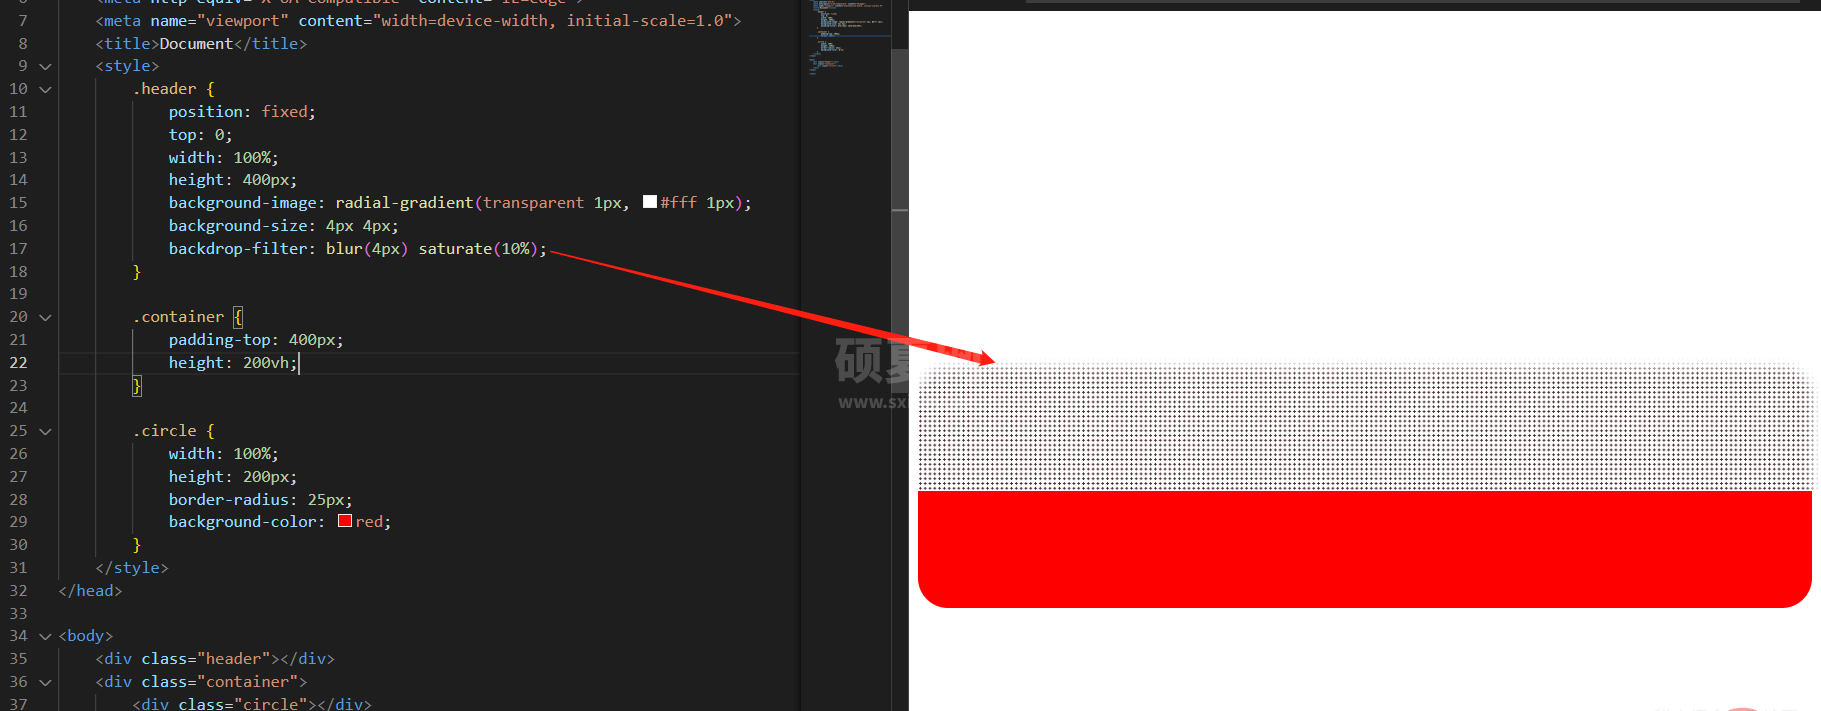
完全黑了,红黑了,那湿的透透的了,哈哈哈~
ok,今天分享就到这,觉得有意思的朋友们记得点赞关注加收藏,因为今天你们学会了一个单词:saturate:湿透了。 sa(湿)tu(透)rate(了) ??????????
推荐学习:《css视频教程》
以上就是“saturate”,又get了新的CSS知识!的详细内容,更多请关注其它相关文章!
