聊聊vscode中如何配置vue文件自定义模板
本篇文章给大家介绍vscode中vue文件自定义模板的方法。有一定的参考价值,有需要的朋友可以参考一下,希望对大家有所帮助。

具体步骤
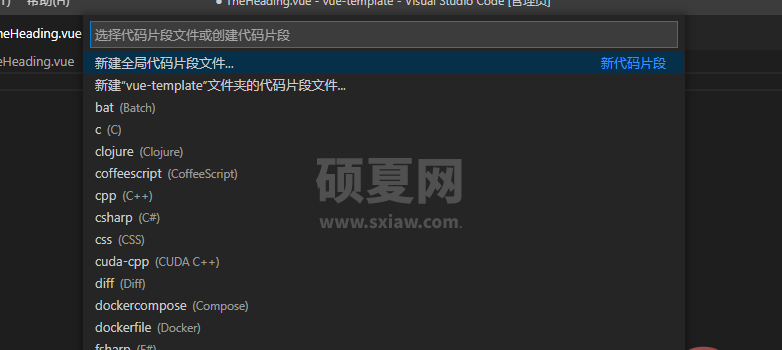
1、文件 --> 首选项 --> 用户片段

在输入框输入vue(如果要设置其他文件的模板,也可以输入其他文件)【推荐学习:《vscode教程》】
2、选择Vue(vue)
编辑器自动打开了一份vue.json文件

3、根据自己的需求,在"Print to console"里如何自己的模板要求,例子如下:
{
    // Place your snippets for vue here. Each snippet is defined under a snippet name and has a prefix, body and
    // description. The prefix is what is used to trigger the snippet and the body will be expanded and inserted. Possible variables are:
    // $1, $2 for tab stops, $0 for the final cursor position, and ${1:label}, ${2:another} for placeholders. Placeholders with the
    // same ids are connected.
    // Example:
    // "Print to console": {
    //  "prefix": "log",
    //  "body": [
    //  "console.log('$1');",
    //  "$2"
    //  ],
    //  "description": "Log output to console"
    // }
    "vue": {
        "prefix": "vue",
        "body": [
            "<template>",
            "  $0",
            "</template>\n",
            "<script>\n",
            "export default {",
            "  name: '',\n",
            "  components: {},\n",
            "  data() {",
            "    return {}",
            "  },\n",
            "  created() {},\n",
            "  methods: {},\n",
            "}\n",
            "</script>\n",
            "<style scoped>",
            "</style>",
        ],
        "description": "This is a simple vue template"
    }
}
prefix: 表示生成自定义模板的命令(vue) body:自定义模板,每行为数组里的一个元素 $0: 表示生成模板后光标的所在位置 description: 自定义模板的描述
4、保存vue.json 文件
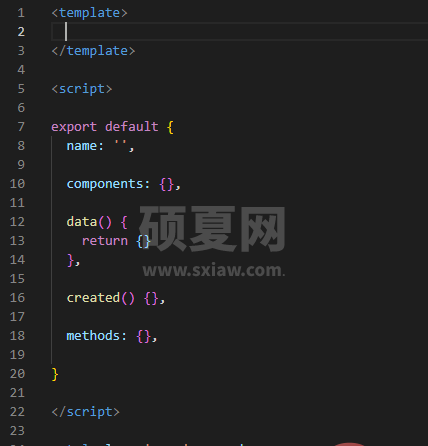
5、新建一个vue文件,输入vue,按回车就可生成刚刚设置好的自定义模板

最终的模板:

那问题来了如果我要设置多个自定义模板呢?
这个也很简单,只有在刚设置好的vue.json里,在写多一个模板就行了,如下:
{
    "vue": {
        "prefix": "vue",
        "body": [
            "<template>",
            "  $0",
            "</template>\n",
            "<script>\n",
            "export default {",
            "  name: '',\n",
            "  components: {},\n",
            "  data() {",
            "    return {}",
            "  },\n",
            "  created() {},\n",
            "  methods: {},\n",
            "}\n",
            "</script>\n",
            "<style scoped>",
            "</style>",
        ],
        "description": "This is a simple vue template"
    },

    "vue2": {
        "prefix": "vue2",
        "body": [
            "<template>",
            "  $0",
            "</template>\n",
            "<script>\n",
            "export default {",
            "  name: '',\n",
            "  props: {},\n",
            "  data() {",
            "    return {}",
            "  },\n",
            "  created() {},\n",
            "  methods: {},\n",
            "}\n",
            "</script>\n",
            "<style scoped>",
            "</style>",
        ],
        "description": "This is a simple vue template"
    },
}
更多编程相关知识,请访问:编程视频!!
以上就是聊聊vscode中如何配置vue文件自定义模板的详细内容,更多请关注其它相关文章!
